You’re riding along, minding your own business, and then it starts. Squeak. Squeak. Squeak. Every time your foot comes around, that same little noise pops up again.
It’s annoying. It might even make you nervous. Is something breaking? Do you need a new part? Is this going to cost you money?
Take a breath first. An e-bike squeaking when you pedal is one of the most common complaints out there, and also one of the easiest to figure out once you know what to listen for.
Here’s the whole secret to fixing bike noise: the sound itself is a clue. A squeak, a click, and a grind are three different sounds, and they almost always point to three different parts of your bike. Once you know which sound you’ve got, you’re already halfway to the fix.
This guide walks through all three. We’ll cover what each sound usually means, how the motor adds its own twist to the mix, and a simple test for each cause. Most of these tests take less than two minutes, and none of them need special tools.
Why E-Bikes Make Noise That Regular Bikes Don’t
A regular bike has one source of power: your legs. An e-bike has two — your legs and the motor. More power sources means more moving parts, and a lot of those parts are sealed up inside housings you can’t just pop open and peek at.
E-bike motors also push a lot more force through the chain and gears than your legs alone ever could. That’s great for hills. It’s also why chains and cassettes wear out faster on a higher-powered e-bike than on a regular bike, and the jump from a 500W motor to a 750W one makes a bigger difference to that wear than most riders expect.
It also helps to know which type of motor you have before you start testing:
- Hub motors sit inside the front or back wheel and spin it directly. A hub motor problem often shows up even while you’re coasting, not just when you pedal.
- Mid-drive motors sit near the pedals and push power straight through your chain. A mid-drive problem almost always shows up only while you’re pedaling, since the motor and your legs share the same chain.
Keep that difference in mind as you read on. It’s the gap between a noise you’ll hear no matter what you’re doing, and a noise that only shows up the second your foot pushes down.
Squeak, Click, or Grind? Why the Sound Itself Is Your Best Clue
Before you grab a wrench, just listen for a second. The type of sound tells you almost everything.
E-Bike Squeaking When Pedaling is a high, thin sound, like a rusty hinge. It almost always means something needs lubrication, or two dry surfaces are rubbing together. A click is a short, sharp sound that repeats once or twice with every full turn of the pedals. Clicks usually mean something’s loose or not seated right. A grind is a low, rough, scraping sound, often paired with a gritty feeling through the pedals. Grinding usually means a bearing or a gear is wearing down.
Here’s how that maps out at a glance:
| Sound | Most Likely Cause | Quick Test |
| Squeak | Dry chain, dry pedal threads, a rubbing brake | Lift the wheel, spin the pedals by hand |
| Click | Loose chainring bolts, bottom bracket play, a stiff chain link | Wiggle the crank arms and chainring by hand |
| Grind | Worn bottom bracket bearings, worn motor gears or bearings | Spin the cranks or wheel by hand, feel for grit |
None of this is set in stone. A bad enough problem can eventually cause more than one kind of sound. But as a starting point, this is exactly how a mechanic listens to a bike before touching a single tool. Let’s go through each one.
Squeaking Noises: Causes and Tests
A Dry or Dirty Chain
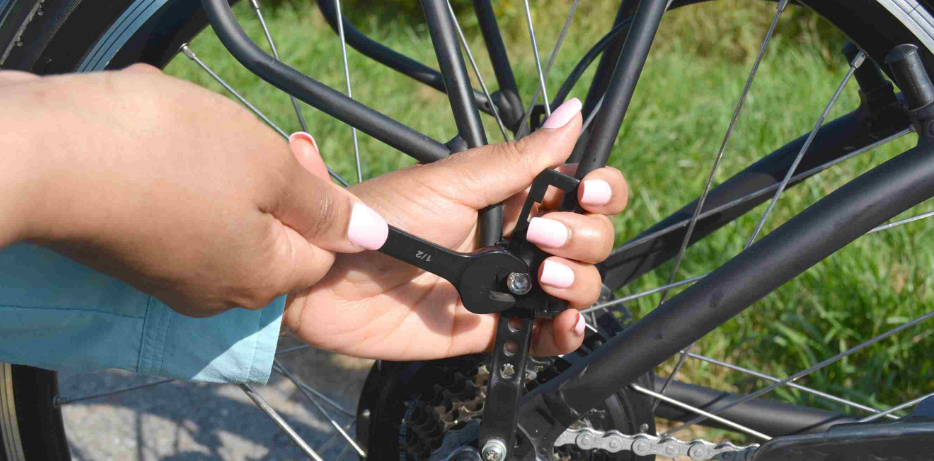
This is the number one reason e-bikes squeak. Your chain is made of dozens of tiny moving parts, each with a pin and a roller, and they all need a thin film of oil between them. Ride enough miles, or get caught in enough rain, and that oil wears away. Metal starts rubbing on metal. That’s your squeak.
The test: Lift your back wheel off the ground, or flip the bike onto its seat and handlebars. Turn the pedals by hand and listen closely. A dry chain usually squeaks with almost every link that passes through the derailleur.
The fix: Wipe the chain down with a clean rag to knock off loose dirt. Add a few drops of bike-specific chain lube to the top of each link while slowly turning the pedals backward, let it sit a minute, then wipe off anything extra. Extra lube on the outside just attracts more dirt, so less is more here.
Loose or Dry Pedals
Sometimes the squeak isn’t the chain at all. It’s coming from right under your foot.
The test: Stop pedaling with one foot and spin that pedal by hand. If the squeak follows the pedal, you’ve found it.
The fix: Pedal threads dry out over time, and clipless pedals have a cleat-and-pedal interface that squeaks when it gets gritty. Remove the pedal, add a light coat of grease to the threads, and reinstall it snugly. If you ride with clip-in shoes, check the cleat on the bottom of your shoe too, since a worn or dirty cleat squeaks just as easily as a dry pedal.
Brakes That Fake a Pedaling Squeak
Here’s a trick that fools a lot of riders. Since your wheel spins once for roughly every pedal stroke or two, a brake pad rubbing the rotor can sound like it’s perfectly synced to your pedaling, even though it has nothing to do with your legs.
The test: Coast without pedaling on flat ground, or lift the wheel and spin it by hand. If you still hear the squeak with your feet completely still, it’s your brakes, not your drivetrain.
The fix: A rubbing disc brake usually means the caliper needs a small realignment, or the rotor is slightly bent, both common after a bike gets bumped. A shop can true a bent rotor in a few minutes. If your brakes only squeal when you actually squeeze the lever, that’s a different and very normal story — the pads are probably just glazed or dirty and need a light clean.
Clicking Noises: Causes and Tests
Loose Chainring Bolts
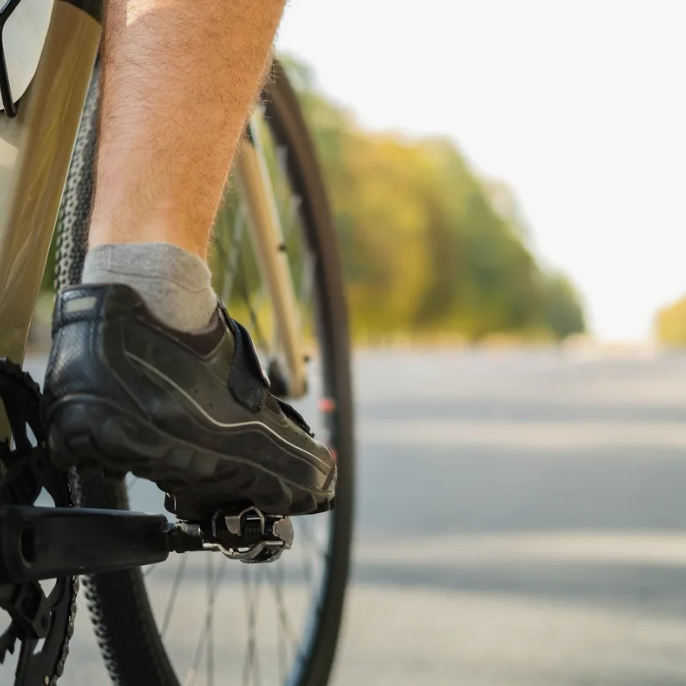
Your chainring, the toothed disc your pedals turn, is held to the crank arm by several small bolts. Loosen even one, and you’ll hear a click every time you push hard on the pedals.
The test: With the bike in a stand or flipped over, grab the chainring and wiggle it side to side. Any movement means a loose bolt.
The fix: Tighten each bolt with the correct hex key, working evenly around the ring instead of cranking down on just one. If a bolt keeps working loose, a small dab of threadlocker will hold it in place for good.
Bottom Bracket Play
The bottom bracket is the bearing set your crank arms spin on, tucked inside the frame right below your seat. When it has play, meaning it can wiggle instead of just spinning smoothly, you’ll hear a click with almost every pedal rotation, especially when you stand up and push hard.
The test: Take the chain off the chainring, or shift so there’s no tension on it, then grab both crank arms and rock them side to side. Any looseness here, even a small amount, means the bottom bracket needs attention. A quick trick you can try mid-ride: stand up and pedal out of the saddle. If the click disappears, it was probably your seat or seatpost. If it continues, especially on hard pushes, that points to the bottom bracket or chainring bolts.
The fix: A loose bottom bracket almost always needs a shop visit, since tightening one properly takes a tool specific to your bike’s bottom bracket type. It’s a cheap fix if you catch it early, before the bearings themselves start wearing out.
A Stiff Link in the Chain
Not every click comes from something loose. Sometimes one single link got bent slightly, usually from a rough shift or a chain that popped off at some point. That one stiff spot doesn’t bend as smoothly around the derailleur pulleys as the rest of the chain, so it clicks every time it comes around.
The test: Lift the back wheel, turn the pedals slowly by hand, and watch the chain as it wraps around the small derailleur pulleys. A stiff link will visibly hesitate or jump at the same spot every single rotation.
The fix: Flex the stiff link back and forth by hand, side to side, until it moves as freely as the links next to it. If that doesn’t work, a basic chain tool lets you push the pin through and free it up properly, or you can swap out that one link entirely.
The Click That Isn’t a Problem At All
Quick note before you chase your tail: if your e-bike clicks while you’re coasting, not pedaling, that’s very likely just your freehub doing its job. Small spring-loaded pieces called pawls click into place so your rear wheel can spin freely when you stop pedaling. It’s completely normal on almost every bike, e-bike or not. The click actually worth chasing is one that happens while you’re pedaling and putting power down.
Grinding Noises: Causes and Tests
Worn Bottom Bracket Bearings
A bottom bracket that’s gone past “loose” and into “worn out” stops clicking and starts grinding. The bearings have lost their smoothness, usually from water or grit that got past the seals.
The test: Same setup as the click test. Take the chain off and spin the crank arms by hand. A healthy bottom bracket spins smooth and quiet. A worn one feels gritty and rough, almost like turning a handle full of sand.
The fix: This almost always means a full replacement, not just a tightening. It needs a tool specific to your bike’s bottom bracket type, so unless you already do your own bike maintenance regularly, this is a job for a shop. The part itself is usually cheap. Labor is where most of the cost is.
Hub Motor Gears or Bearings
If your e-bike has a hub motor built into the wheel, a grinding sound usually points to one of two things happening inside that sealed housing. Many hub motors use small internal gears, often a tough nylon, to multiply the motor’s power, and those gears wear down over enough miles until a tooth shears clean off. The motor’s bearings can also wear out once water works its way inside.
The test: With the bike on a stand and the power off, spin the wheel with the motor completely disengaged. Then turn the power on and spin it again with a little throttle or pedal assist. If the grinding only shows up with power on, it’s almost certainly happening inside the motor.
The fix: This isn’t a driveway repair. Opening a sealed hub motor takes specific tools, and doing it wrong can void your warranty or damage the motor further. Get in touch with the manufacturer or a shop that services e-bikes specifically. If your bike is still under warranty, this is exactly the kind of repair it should cover.
Mid-Drive Motor Gears or Bearings
A mid-drive motor sits at the pedals and shares your chain, so grinding here almost always shows up only while you’re pedaling with assist turned on. Inside the housing, reduction gears and a clutch mechanism work hard every time you press down, and those parts wear with age and mileage just like anything else that spins under load.
The test: This is where a throttle helps, if your bike has one. Twist it and roll forward without pedaling at all — some e-bikes can keep moving like this for miles, so you’ve got plenty of time to listen. If the grinding disappears completely without your legs in the mix, the noise is tied to your pedaling and probably your regular drivetrain, not the motor. If it’s still there under throttle alone, the motor is the more likely source.
The fix: Like a hub motor, this is specialist territory. Most mid-drive systems are sealed units serviced through the manufacturer’s network. Grinding also tends to show up more often on a motor that’s covered a lot of miles, especially an e-bike that changed hands once or twice before you owned it, so it’s worth asking about service history before assuming the worst.
One more thing worth knowing: a soft hum or gentle whine from your motor under load, especially while climbing, is completely normal. That’s just the internal gears and electronics working. The sound to actually pay attention to is a harsh grind, a loud screech, or a click that keeps getting worse.
The Two-Minute Test You Can Run Right Now
If you don’t want to read through every section above, here’s the fast version. Run through these steps in order and stop as soon as you find your answer.
- Lift the back wheel and turn the pedals by hand. Hear the noise? It’s mechanical — chain, pedals, bottom bracket, or a rubbing brake — not electrical.
- Coast without pedaling, motor off. Noise still there? Check your brakes and wheel first, since the problem is following the wheel, not your legs.
- Try the throttle without pedaling, if you have one. Noise shows up here too? It’s likely your motor. Noise disappears? It’s tied to your pedaling, meaning your regular drivetrain.
- Stand up and pedal out of the saddle. Noise disappears? Check your seat and seatpost. Noise continues, especially on hard pushes? That points to your bottom bracket or chainring bolts.
- Wiggle the parts by hand — crank arms, chainring, saddle rails, wheel — one at a time. Whatever moves that shouldn’t is probably your culprit.
Most riders find their answer somewhere in the first three steps.
DIY Fix or Call a Professional?
Not every noise is a driveway job, and that’s okay.
- Handle it yourself: cleaning and lubing a chain, tightening a loose bolt, greasing pedal threads, freeing up a stiff chain link, or realigning a rubbing brake caliper. These need basic tools, take a few minutes, and are hard to mess up badly.
- Let a shop handle it: bottom bracket replacement, anything involving a mid-drive or hub motor’s internal parts, hydraulic brake work, or a bent derailleur hanger. These need specific tools, and getting them wrong can turn a small problem into an expensive one.
There’s a money question worth asking honestly too. If you’re staring down a bottom bracket replacement and a motor issue on a bike that’s already several years old, add up the repair cost before you commit to it.
Sometimes fixing it is the right call. Other times, especially on an older bike with a lot of miles, the math ends up close to what a new e-bike costs anyway. Neither answer is wrong. It just depends on the bike and what it’s worth to you.
Keeping Your E-Bike Quiet Going Forward
A little regular care goes a long way toward a quiet ride.
- Lube your chain every 100 to 150 miles, sooner if you’ve ridden in the rain, and wipe off the excess every time. A dripping chain just collects grit.
- Check your bolts every month or so — chainring bolts, crank bolts, pedal threads. A quick wiggle test takes thirty seconds.
- Clean off grit after messy rides. Sand, mud, and road salt all work their way into bearings and chain links if you let them sit.
- Listen on purpose once in a while. Ride around the block with no headphones in. New noises are much easier to catch, and fix cheaply, while they’re still small.
A quiet e-bike isn’t an accident. It’s what happens when small stuff gets caught before it turns into big stuff.
Frequently Asked Questions
Is it safe to keep riding an e-bike that’s squeaking?
Usually, yes. A squeak alone is annoying, not dangerous. But if it turns into a grind, or you notice wobbling, weak brakes, or a burning smell, stop riding and get it checked before you go any further.
Why does my e-bike only squeak when I pedal hard?
Harder pedaling means more pressure on every part of your drivetrain, from the chain to the bottom bracket. A part that’s only just barely dry or just barely loose often stays quiet under light pedaling and only speaks up once you really lean into it.
Can I use WD-40 to fix a squeaky e-bike chain?
It’ll quiet things down for a ride or two, but it’s not a real fix. WD-40 is a cleaner and a light penetrating oil, not a proper chain lubricant, and it washes off fast. Use it to clean a gunky chain if you need to, then follow up with an actual bike-specific chain lube.
Why does my e-bike make more noise than a regular bike?
More torque and more parts. The motor multiplies the force going through your chain and gears, which wears them faster and makes existing squeaks or clicks louder and more noticeable than they’d be on a regular bike.
How often should I lube my e-bike chain?
Every 100 to 150 miles is a good rule of thumb, or anytime it starts looking dry or sounding squeaky. Ride in the rain often? Lube it more often than that.
Wrapping Up
Most e-bike noises are more annoying than serious, and most of them have a fix you can do yourself with tools you probably already own. Listen for the type of sound, run through the tests above, and you’ll know what you’re dealing with before you even pick up a wrench.
And if the problem you’re actually chasing isn’t a noise at all — say, your bike won’t power on like it used to — the same troubleshooting mindset works there too, starting with the simple stuff before assuming the worst.