You’ve got a bike. You’ve got a few days off work. And somewhere in the back of your mind, there’s a picture of you riding into a new town with everything you need strapped to your bike. That’s bike touring, and it’s a lot more doable than it looks from the outside.
The riding part usually isn’t the hard part. Most people can pedal 20 or 30 miles in a day once their body gets used to it. The hard part is everything around the riding: picking a route, figuring out how far to go each day, packing the right gear, finding a place to sleep, and knowing what the whole trip is going to cost.
That’s what real bike touring trip planning comes down to — not raw fitness, but good decisions made ahead of time. This checklist walks you through those decisions in the order you’ll actually need to plan a multi-day bike touring trip. By the end, you’ll have an actual plan instead of just a daydream.
Here’s the Short Version: Plan a Multi-Day Bike Touring Trip
If you want the quick version of bike touring for beginners before diving in, here it is:
- Pick your route and trip length
- Set a realistic daily mileage goal
- Build a gear list that won’t weigh you down
- Decide where you’ll sleep each night
- Map out your budget
- Get your bike and body ready
- Handle the small stuff that trips people up
Now let’s go through each one.
Step 1: Pick Your Route and Trip Length First
Everything else in this checklist depends on this first decision, so start here. Where are you going, and how many days do you have?
For a first tour, keep it small. Planning your route close to home on secondary roads instead of busy highways makes the whole thing safer and less stressful, and it means help isn’t far away if something goes wrong. Two or three days is plenty for a first trip. You can always go bigger once you know what you’re doing.
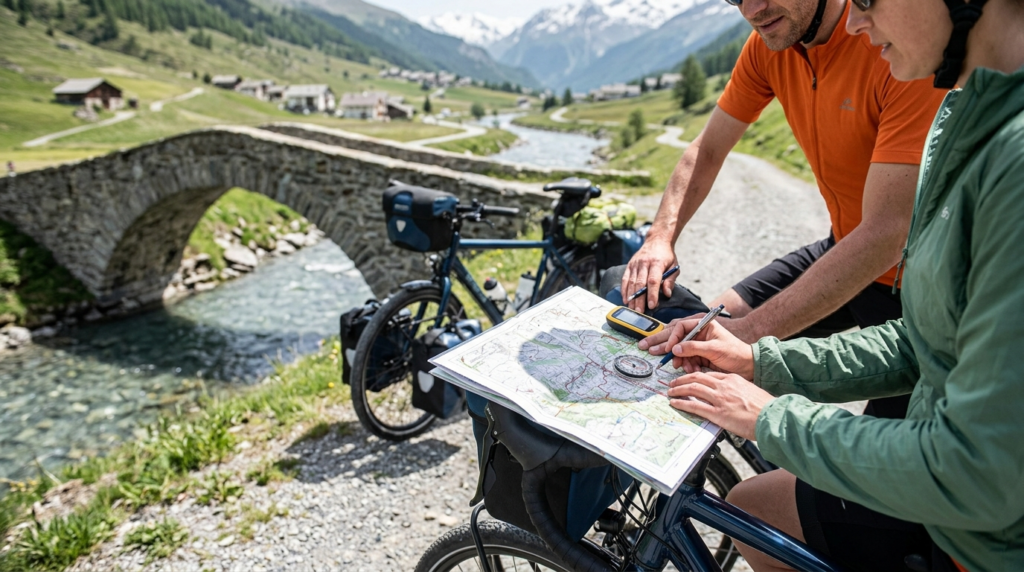
A few tools make route planning a lot easier than staring at a paper map. Apps like Komoot, RideWithGPS, and cycle.travel pull from map data built by other cyclists, so they surface bike paths, gravel roads, and quiet backroads that a typical driving-map app would never show you. Komoot in particular can split a long route into separate days for you and mark nearby campgrounds and other useful stops along the way, which takes a lot of the guesswork out of a multi-day plan.
If building a route from scratch feels like too much, you don’t have to. Established routes through the Adventure Cycling Association’s route network or the U.S. Bicycle Route System are already mapped and picked for being cycling-friendly. Riding a known route is a completely legitimate way to plan your first trip. Nobody hands out points for originality.
Step 2: Get Real About Your Daily Mileage
This is where most beginners get into trouble. They see that the average long-distance tourer covers 40 to 60 miles a day and figure that’s the number to aim for right away. It isn’t.
If you’ve never ridden a loaded bike before, a smarter target is something like half to two-thirds of the distance you already know you can ride comfortably unloaded. That’s the advice from the Adventure Cycling Association, one of the biggest cycling groups in the country, and it holds up in practice. A loaded bike handles differently, and it takes more effort to move.
For most first-timers, that puts a good starting number somewhere around 20 to 35 miles a day. Other guides put the beginner range closer to 30 to 40 miles a day, and either number works fine as a place to start. What matters more is building in slack, because wind, hills, a mechanical problem, or just feeling more tired than expected can all cut into your mileage on any given day. A route that looks perfect on paper can take a lot longer in real life.
One more thing worth doing before you leave: ride your planned daily distance at home, fully loaded, on a similar kind of road. It’s the best way to find out how your body and your bike handle the extra weight before the trip forces you to find out the hard way. Much Better Adventures
If hills or higher mileage make you nervous, an e-bike changes the math. Pedal-assist can add real miles to your day without piling on fatigue, though it’s worth understanding how much assistance an e-bike actually gives before you plan a route around it.
Step 3: Build Your Gear List (Without Overpacking)
Every touring gear list breaks down into the same five buckets: what you wear while riding, what you wear off the bike, camp basics like a tent and sleeping bag, tools and spare parts, and a way to cook. That’s it. Everything else is a variation on those five things.
Here’s the good news: you probably already own most of what you need for a first trip, since a short weekend tour doesn’t actually require different gear than a longer one — just less food and fewer clothes.
The bigger decision is how you’ll carry it all. Rear panniers clip onto a rack and give you the most room, which makes them the easiest option for a first loaded ride. Bikepacking bags strap straight to the frame instead, which keeps the bike’s handling closer to normal and works well on rough terrain, but they hold less overall. Plenty of tourers mix the two: panniers for the bulk of it, a handlebar bag for snacks and a phone.
If you’re going the pannier route, sizing them right matters more than people expect — the size of pannier you need for touring really comes down to how many days you’re out and how self-sufficient you’re being, camping versus staying in towns.
For tools, keep it simple. A multi-tool, a spare tube, a patch kit, and a pump cover most roadside problems, and it’s worth learning how to fix a flat and adjust your brakes before you go. You don’t need to be a mechanic. You just need to not get stuck.
And then there’s the one rule almost every experienced tourer agrees on: overpacking is the single most common mistake beginners make, and every extra pound costs energy on every climb, all day, every day. Pack for the trip you’re actually taking, not the one where you might need twelve outfits.
Step 4: Decide Where You’ll Sleep Each Night
This decision shapes almost everything else, so it’s worth nailing down early.
Camping is the cheapest option, and it’s what most self-supported tourers rely on. Public campgrounds and state parks are everywhere, and the route-planning apps mentioned earlier will usually show you which ones sit close to your path.
If camping isn’t your thing, or you want a break from it partway through, Warmshowers is worth knowing about. It’s a hospitality network built specifically for touring cyclists, where local hosts offer a bed, a shower, or just a patch of yard to pitch a tent. It’s free, it’s built entirely around cycling, and it connects you with people who already understand what you’re doing. Hostels, guesthouses, and hotels round out the rest of the options, and which one makes the most sense really depends on where you’re riding and what you’re willing to spend.
Most beginners end up mixing styles: camping most nights, with a hotel or hostel thrown in when the weather turns bad or your body just needs a real bed. There’s no wrong answer here. Just decide roughly what your nights will look like before you go, so it isn’t a decision you’re making while tired and hungry on the side of the road.
Step 5: Map Out Your Budget
Bike touring has a reputation for being expensive. It doesn’t have to be.
There are really two budgets here: what it costs to get geared up, and what it costs to be on the road each day.
If you’re starting from zero, a solid touring-capable bike runs somewhere between $800 and $1,200, and plenty of people manage their first trip on a bike they already own. Add the rest of your gear on top, and a full setup is often quoted anywhere from around $1,000 to $10,000, though it’s entirely possible to do it for less than $1,000 total by reusing what you have and buying secondhand.
For daily costs on the road, here’s a rough breakdown:
- Bare-bones ($10–20/day): Free or cheap camping, cooking everything yourself, very few extras. Some experienced riders manage on as little as $10 a day this way, though it takes some hunting for free spots to camp.
- Standard ($35–50/day): This covers paid campgrounds and groceries, with a bit left over for repairs or a gear replacement if something breaks along the way. For most beginners, this is the realistic, comfortable range to plan around.
- Comfort ($75–100+/day): Motels or budget hotels most nights, eating out more than cooking. Riders who lean this way often land close to $100 a day.
To turn any of this into a real savings goal, multiply your daily number by how many days you’re touring. That total is roughly what you need saved before you go — pad it a little for the stuff you can’t plan for, like a bent wheel or an extra night somewhere you didn’t expect.
Step 6: Get Your Bike (and Your Body) Ready
Two things need to be ready before you leave: your bike and you.
Start with the bike. Fresh tires, a clean and lubed chain, working brakes, and cables that aren’t fraying will save you from most of the roadside problems that ruin a first trip. Get this done at least a couple of weeks out, not the night before, in case a part needs ordering.
From the repair bench: The bikes that come in two days before someone’s big trip almost always have the same three problems — a chain stretched way past its replacement point, brake pads worn down to the metal, and tires that haven’t seen air in months. None of it’s hard to fix. All of it’s a bad surprise fifteen miles from the nearest bike shop. Give your bike a real look at least two weeks out, not the weekend before.
As for your body, you don’t need to be an athlete. If you haven’t ridden much lately, give yourself something like 8 to 12 weeks of steady riding before your trip, building up gradually instead of jumping straight to long days. The single most useful thing you can practice isn’t distance. It’s riding on back-to-back days, since that actually mimics what a multi-day tour asks of your body. A Saturday-Sunday ride teaches you more about touring fatigue than one long solo day ever will.
Step 7: Handle the Small Stuff That Trips People Up
A few last details separate a smooth trip from a stressful one, and they take almost no time to sort out.
Check the weather before you leave, and check it again each morning you’re on the road. Multi-day forecasts aren’t perfect, but they’ll tell you if you need to shift a rest day or push through some extra miles before a storm rolls in.
Tell someone your route and roughly when you expect to check in, even if you’re touring solo and even if it feels unnecessary. It costs you nothing, and it means someone notices if you go quiet.
Bring a paper map or a downloaded offline version of your route as backup. Apps are great until a phone dies or a signal drops, and neither of those things asks permission first. A small battery pack for charging your phone and lights is cheap insurance.
And on the road itself, keep it simple: ride predictably, use lights even in daylight, and give yourself more space around traffic than feels strictly necessary. None of this is complicated. It’s just easy to forget when you’re focused on gear and routes and budgets.
Your Quick-Reference Checklist
Before you roll out, run down this list one more time:
- Route picked and loaded into a cycling app, or written down on paper
- Daily mileage goal set conservatively, with rest days built in
- Bike serviced: chain, brakes, tires, and cables all checked
- Gear sorted into panniers or bikepacking bags, with a hard look for anything you can leave behind
- Repair kit packed: multi-tool, spare tube, patch kit, pump
- Lodging plan set for each night — camping, Warmshowers, hostels, or a mix
- Budget calculated for both gear and daily costs, with a cushion for surprises
- Training rides done, including at least one back-to-back weekend
- Weather checked for the trip window
- Route and check-in plan shared with someone at home
- Backup map, charged battery pack, and lights packed
Frequently Asked Questions
How many miles a day should a beginner plan for on a bike tour?
Somewhere around 20 to 35 miles a day is a safe starting point for a first multi-day trip. Build up from there once you know how your body handles a loaded bike, and always leave room for a shorter day if the terrain or weather turns against you.
Do I need a touring bike to go bike touring?
No. Almost any bike that fits you and can carry a rack or bags will work for a first trip. A dedicated touring bike helps once you’re doing longer or heavier trips, but it isn’t required to get started.
How much does a multi-day bike tour cost?
Daily costs usually land between $35 and $50 if you’re camping and cooking your own food, with cheaper trips possible for $10 to $20 a day. Staying in hotels and eating out most meals pushes that closer to $75 to $100 a day.
Where do people sleep during a bike tour?
Most tourers mix it up: public campgrounds, host networks like Warmshowers, hostels, and the occasional motel. Your route and budget usually decide the mix for you.
What’s the difference between bike touring and bikepacking?
Bike touring usually means a bike with racks and panniers, often sticking to roads. Bikepacking uses frame-mounted bags instead of panniers and often includes rougher, off-road terrain. The planning steps are nearly the same either way.
Ready to Go
None of this has to be perfect before your first tour. Most experienced tourers will tell you their first trip had a gear list that was wrong, a route that ran long, and a night or two they didn’t expect. That’s normal, and it’s honestly part of the fun.
If you take one thing away from this, let it be this: learning how to plan a cycling trip really comes down to making a handful of decisions ahead of time — route, mileage, gear, sleep, and money — instead of figuring them out on the fly. Do that, and you’ll roll out with a route you can actually handle, a bike packed light enough to enjoy, and a rough idea of what it’s all going to cost.
That’s enough to get you out the door. Once you’re out there, the rest tends to sort itself out one pedal stroke at a time.