A bike chain tool works by removing and installing bike chains with ease. The tool’s design allows for easy adjustments, ensuring smooth gear shifting and prolonging the lifespan of your bike’s chain. It helps in breaking the chain links, making repairs or adjustments, and reassembling the chain.
This tool is designed to push out the chain pins, allowing the chain to be separated or joined together as needed. With its compact and portable design, a bike chain tool is a must-have for any cyclist who wants to maintain and repair their bike chain.
Bike chain tools are an essential tool for cyclists who need to maintain and repair their bikes. Whether you are a professional cyclist or a casual rider, this tool will make the process of fixing your bike chain simple and efficient.
In this blog post, we will discuss the functions of a bike chain tool and why it is an essential tool for cyclists.
Understanding the Basics of a Bike Chain Tool
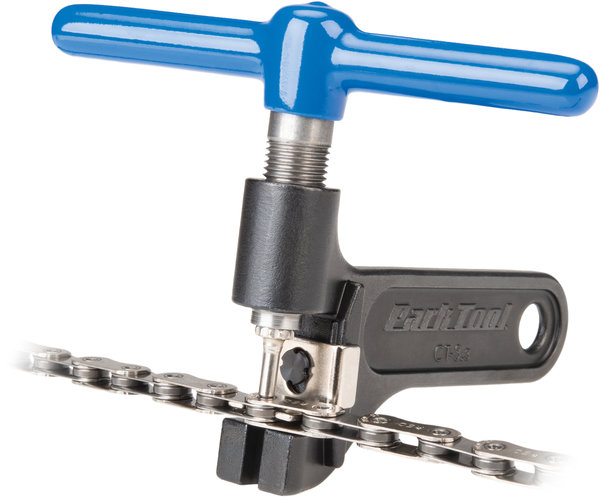
A bike chain tool, often called a chain breaker or chain splitter, is a small, handheld device designed specifically to remove or add links from a bike chain. The tool enables cyclists to modify their chain length, which can be necessary for repairs or adjustments, such as changing the bike’s chainring or adjusting for a new rear cassette. The bike chain tool uses a compact handle, a threaded rod, and a chain cradle to achieve the link removal.
Components of a Bike Chain Tool
Knowing the key parts of the tool makes it easier to understand how it works:
- Handle: Provides grip and leverage while turning the tool.
- Cradle (or Chain Slot): Holds the chain in place, usually has slots for different chain sizes.
- Push Pin (or Drive Pin): A small, pointed component designed to push out the rivets or pins holding the chain links together.
- Rotating Screw Mechanism: Allows for smooth control over the push pin, making it easier to press out the chain pins.
With these components working together, the bike chain tool lets you add or remove chain links as needed for repairs, chain replacement, or adjustments.
How Does a Bike Chain Tool Work?
A bike chain tool has several functions, including removing and installing pins in a bicycle chain.
When a chain becomes worn or damaged, it may need to be repaired or replaced. A bike chain tool makes this process easier by allowing you to remove and install pins in the chain.
Additionally, a bike chain tool can be used to adjust the length of a chain, which is important for ensuring proper bike performance. Here’s a simplified explanation of how it works:
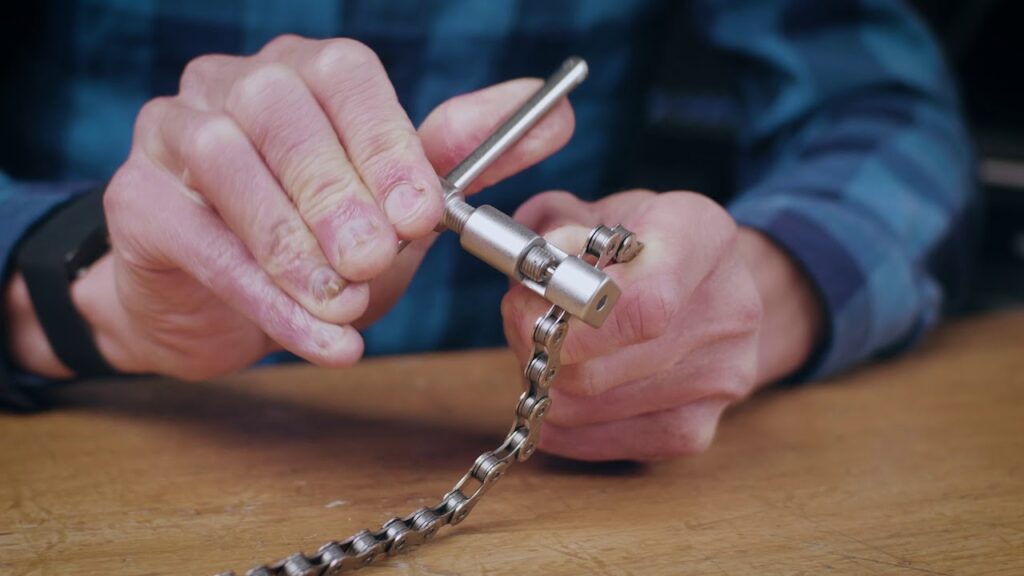
- Insert the Chain into the Tool: Place the chain link you want to remove into the cradle of the tool. Align it so that the push pin is directly over the pin you want to push out.
- Align the Push Pin: Turn the handle gently to line up the push pin with the chain pin. This ensures the chain pin can be pressed out smoothly.
- Apply Pressure with the Handle: Once aligned, start turning the handle of the tool to drive the push pin forward. The push pin will press against the chain pin, forcing it out and releasing the link.
- Remove or Reinstall Links as Needed: You can remove a link entirely by continuing to press until the chain pin is fully ejected. If you’re shortening the chain, remove the necessary links. To reconnect the chain, you can reverse the process, inserting the pin back into the link or using a quick link.
The process may seem mechanical, but with practice, it becomes intuitive and is an invaluable skill for keeping your chain in top shape.
Step-by-step: Using The Chain Tool
To further understand how a bike chain tool works, here’s a step-by-step guide on how to effectively use one:
Step 1: Position the Chain in the Tool
Start by placing the bike chain on a stable surface. Identify the chain link you want to remove or adjust. Next, position the chain link in the tool’s cradle so that the push pin aligns with the chain pin you’re aiming to remove. It’s essential to line up the push pin precisely with the chain pin, as any misalignment could damage the chain.
Step 2: Apply Steady Pressure to the Push Pin
Hold the handle of the bike chain tool securely, and slowly turn the rotating mechanism. As you apply pressure, the push pin will drive against the chain pin. Be sure to keep the handle steady and avoid too much force initially—gradual pressure works best.
Step 3: Continue Turning Until the Chain Pin is Released
As you keep turning, the chain pin will gradually pop out, releasing the link. Some tools allow you to stop halfway if you only need to loosen the link instead of removing it completely.
Step 4: Adjust or Remove Chain Links as Needed
Once the pin is released, you can remove the link or adjust the chain length. If replacing the chain with a new link, ensure the link is compatible with your chain type. For reinstallation, the process is the same but in reverse, re-aligning and pressing the pin back in place.
Reassembling the chain is a straightforward process that requires precision and attention to detail. Once you have made the necessary adjustments and replaced any damaged links, you can begin the process of joining the chain links together and ensuring proper tension.
Joining Chain Links
Using a bike chain tool, carefully align the pin with the chain link and apply pressure to push the pin back into place. Ensure that the pin is fully inserted and the link is secure before moving on to the next link.
Ensuring Proper Tension
After reassembling the chain, it’s crucial to check the tension. Ensure the chain is neither too loose nor too tight by manually moving the pedals and observing the movement of the chain around the gears.

Credit: www.towpathbike.com
Tips for Using a Bike Chain Tool Safely and Effectively
To ensure your chain maintenance process is safe and effective, keep these tips in mind:
- Align the Chain Properly: Misalignment during pin removal or reinstallation can damage both the chain and the tool, reducing its lifespan.
- Avoid Over-Exerting Pressure: Apply gradual pressure to avoid snapping the chain pin or damaging the link.
- Clean and Lubricate Regularly: A clean and lubricated chain will operate more smoothly, making maintenance tasks easier and extending the chain’s life.
Troubleshooting Common Issues
When using a bike chain tool, you may encounter a few common issues that can hamper the smooth functioning of the tool. Understanding how to troubleshoot these issues is essential to ensure that your bike chain tool works effectively. Here are some tips for troubleshooting common problems.
Stuck Or Broken Pins
If you encounter stuck or broken pins while using a bike chain tool, it can be frustrating. To troubleshoot this issue, carefully inspect the tool for any debris or obstructions that may be causing the pins to get stuck. Try using a small brush or compressed air to clean out any dirt or grime that may be affecting the functionality of the tool. If you find a broken pin, you may need to replace it with a spare pin from your bike chain tool kit.
Misaligned Links
Misaligned links can prevent the bike chain tool from working effectively. To address this issue, carefully examine the links of the chain to identify any misalignments. Use a pair of needle-nose pliers to carefully straighten out any misaligned links. Ensure that the chain is properly seated in the tool before attempting to remove or install pins.
Advanced Uses For Bike Chain Tools
Bike chain tools are versatile gadgets that can be used for more than just fixing or replacing chains. Let’s explore some advanced applications of these handy tools.
- Adjusting Chain Length: For a new chain installation or changing gear components, adjust the chain length by removing extra links.
- Replacing a Damaged Link: If a chain link is bent or worn out, remove it and replace it with a fresh link.
- Breaking the Chain for Deep Cleaning: For an in-depth cleaning, breaking the chain allows you to access all the links and rid the chain of accumulated grime.
- Shortening A New Chain: When installing a new chain, shortening may be necessary to ensure a perfect fit.
- Switching Between Different Chains: Changing between various chains can be done efficiently with a bike chain tool.

Credit: www.amazon.com
How to Choose the Right Bike Chain Tool
Selecting the right tool for your chain size and bike type is crucial for effective maintenance. Factors to consider include:
- Chain Compatibility: Check that the tool supports the chain speed (e.g., 8-speed, 9-speed, 10-speed, etc.) and width.
- Quality of the Tool’s Build: A sturdy, well-made tool will last longer and perform better. Look for models with robust handles and durable push pins.
- Size and Portability: Compact bike chain tools are excellent for on-the-go fixes, while larger tools can offer more leverage for tougher tasks.
- Ergonomics And Durability: Choose a durable chain tool made of high-quality materials for long-lasting use. Ensure the tool is ergonomically designed for comfortable use and made of durable materials.
Maintenance And Care Of Chain Tools
Just as with other tools, regular maintenance is key for a long-lasting bike chain tool. Here’s how to keep it in good condition:
- Clean After Use: After every use, clean off any chain residue from the cradle and the push pin.
- Lubricate Moving Parts: A bit of lubricant on the rotating screw mechanism can help prevent rust and ensure smooth operation.
- Inspect for Wear: Regularly check for signs of wear, especially on the push pin, which may dull over time with repeated use.
Frequently Asked Questions
What does a bike chain tool do?
A bike chain tool allows cyclists to remove, add, or adjust links in their bike chain, enabling chain repairs, replacements, and adjustments for better performance.
Can I use a bike chain tool on any bike chain?
Most bike chain tools are compatible with standard bike chains, but ensure that your tool fits the chain speed (like 10-speed, 11-speed) of your bike.
How often should I use a bike chain tool?
Only use a chain tool as needed for repairs or adjustments. Excessive chain breaking and reassembly can weaken the chain over time.
Can a bike chain tool damage my chain?
If used correctly, a bike chain tool should not damage your chain. However, improper alignment or excessive force can lead to breakage or damage.
Is it hard to learn how to use a bike chain tool?
With a bit of practice and patience, most people can quickly learn how to use a bike chain tool effectively.
What should I do if I lose the chain pin?
You can usually replace it with a quick link or purchase a compatible chain pin from a bike shop for repair.
Conclusion
A bike chain tool is an indispensable asset for anyone looking to maintain their bike efficiently.
By understanding how a bike chain tool works, you empower yourself with the skills to perform timely repairs, make adjustments for smooth rides, and extend the life of your chain.
With regular maintenance and the right techniques, using a bike chain tool becomes second nature, enabling cyclists to take control of their bike’s performance.
Consider this guide your starting point. With practice, you’ll find the bike chain tool an invaluable part of your cycling toolkit, ready to help tackle any chain issues that come your way.


